While you can build a bot for any-use with Chat Leap, this manual describes the process of building a chatbot for a football team. The demo uses R.Madrid, but you can configure for any team. It has match-day reminders, integrations with news via RSS, videos from Youtube, and more, and includes all elements that are used for building generic chatbots.
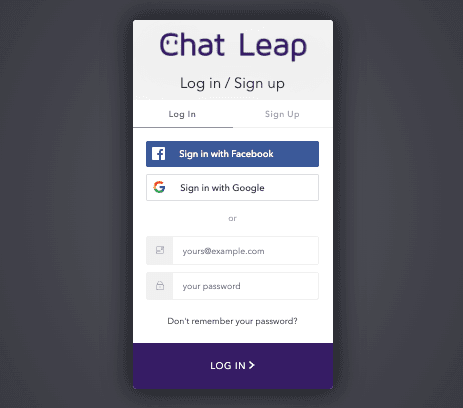
Step 1: Sign up to Chat Leap
Visit app.chatleap.com and register your account.
Recommended: use Google to log in.
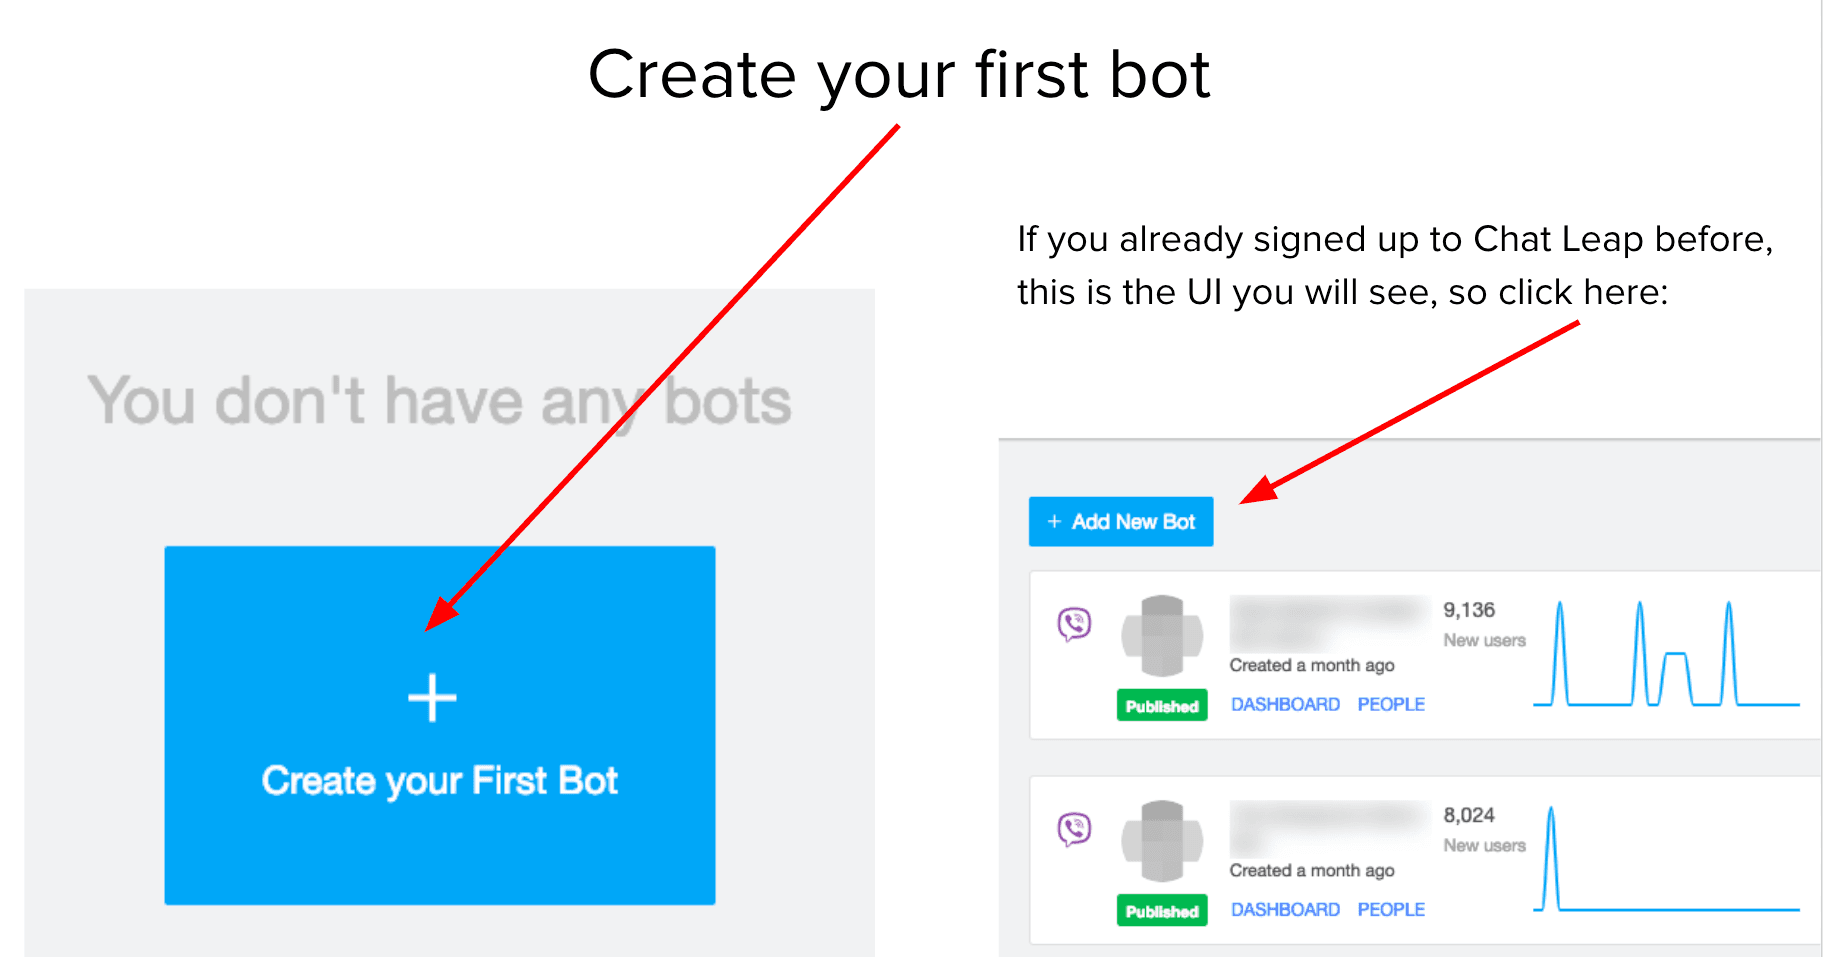
Step 2: Create Your First Bot
Will redirect to /new where you can create the bot on Chat Leap.
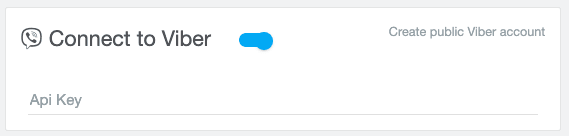
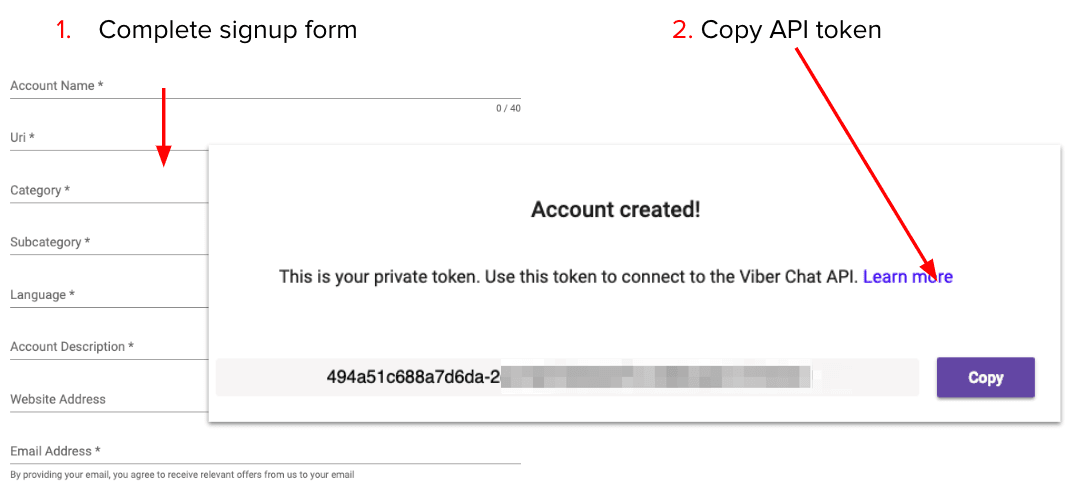
Step 3: Setup Account & Connect API Key (Viber Token)
Click on “Connect to Viber” toggle button, and set your API key
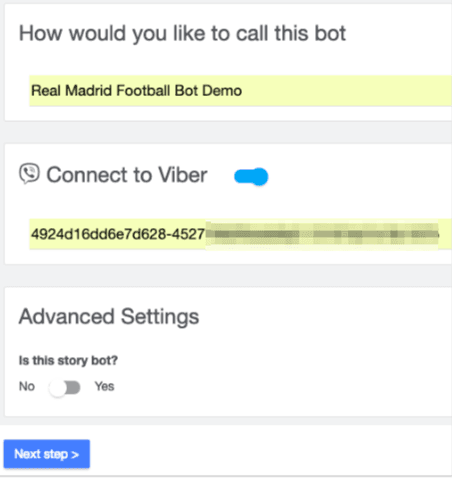
Step 4: Connect the Bot
Name your Chatbot
Paste the API key
Click “Next Step”
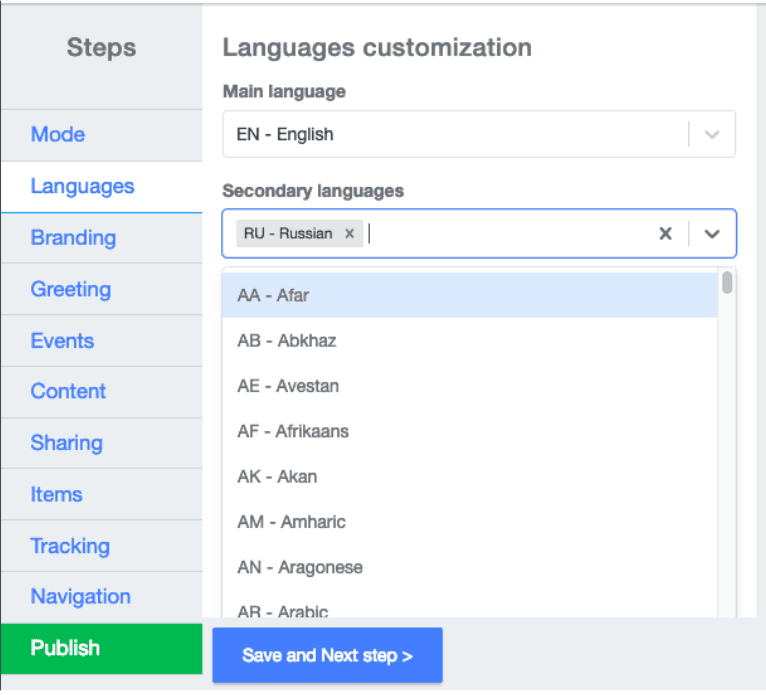
Step 5: Choose Bot language Settings
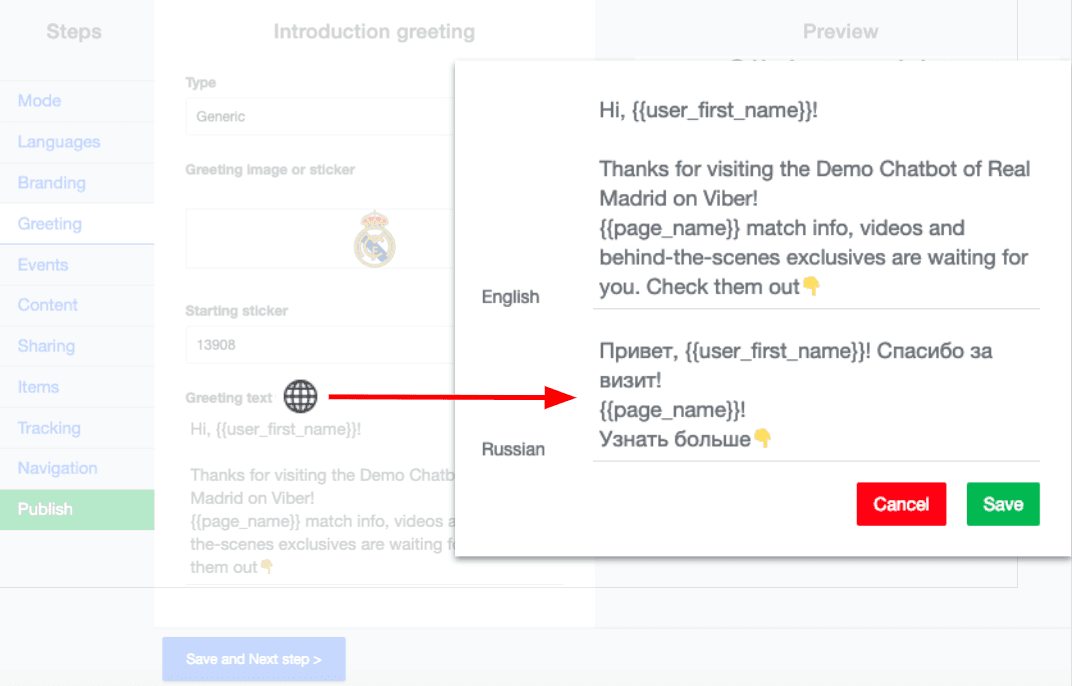
Choose Main language. It will serve as the default to all users of this language, and as a fallback in cases where the secondary language cannot apply.
Secondary language allows to customize language for users of this preference. Look for the globe icon to add translations in the product.
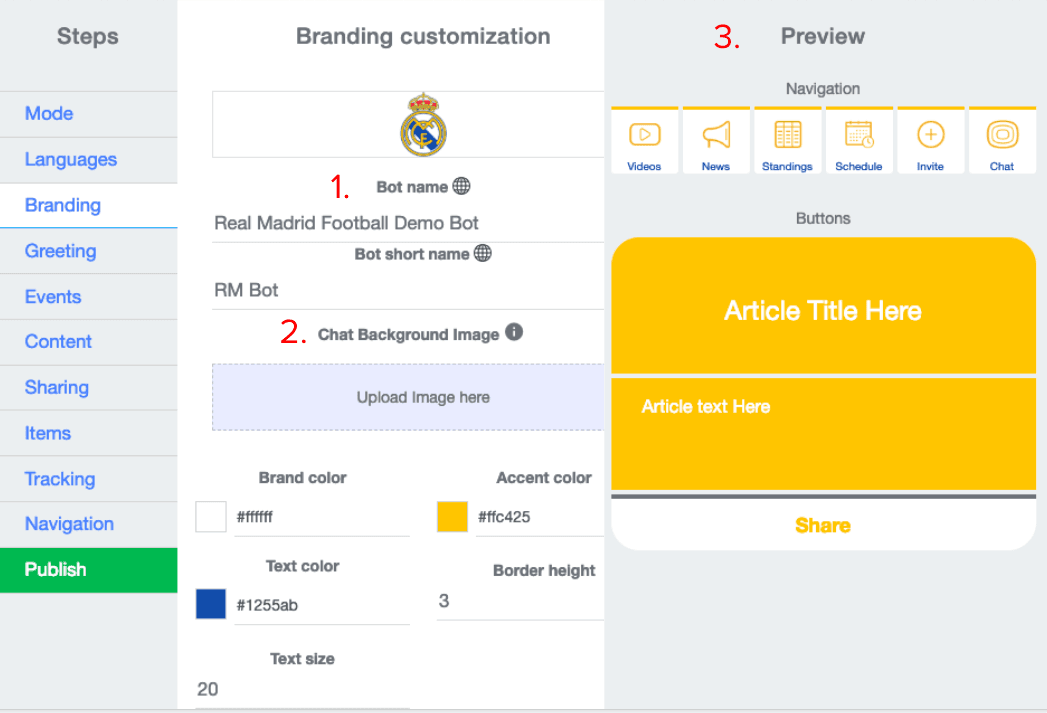
Step 6: Branding and Visuals
Provide name and short name for the bot as it would appear to users (may vary).
You may add a background image, and choose colors for navigation menu and buttons/card. This design will appear anytime the chatbot interacts with users.
See visual preview on the right-hand side.
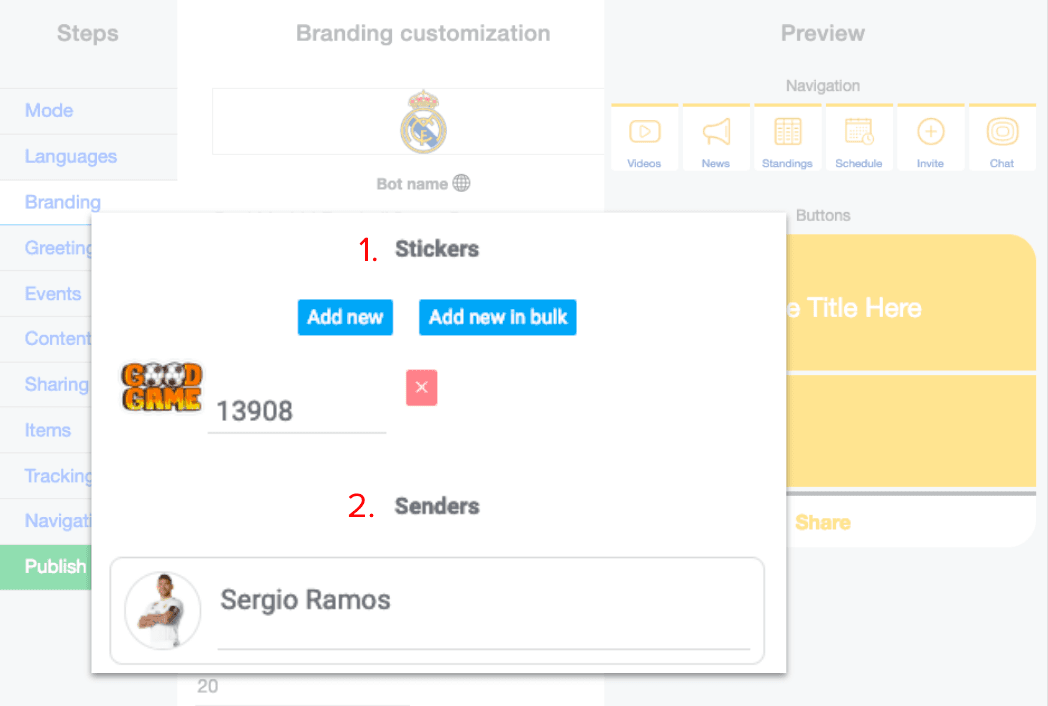
Step 7: Stickers & Senders
- You may add stickers here that could be used later on.
- Add senders: Make it look like someone from the team/brand is sending messages. You can add as many as you’d like and use it later when sending broadcasts
Step 8: Greeting Message
Customize the greeting message of your chatbot. This is the first message your users will see. You can later enhance it to a more complex flow using the Sequences feature.
1. Choose a starting sticker.
2. Customize the greeting message.
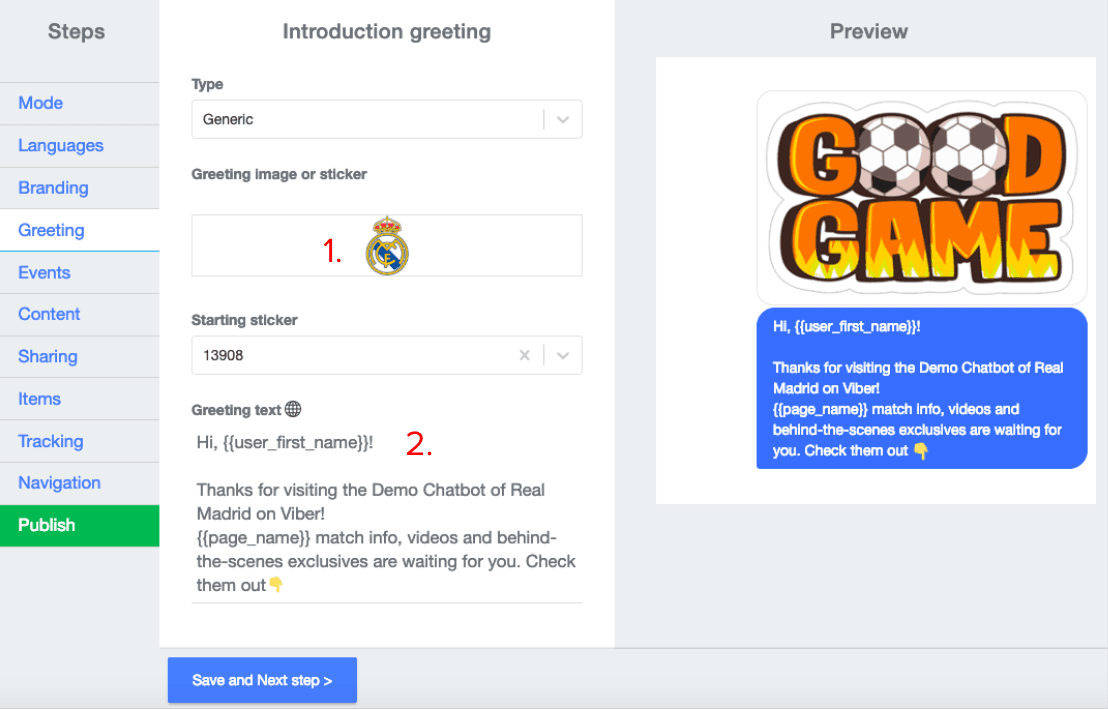
Remember to click the language button and customize your secondary languages.
Step 9: Integrate Events to the Chatbot
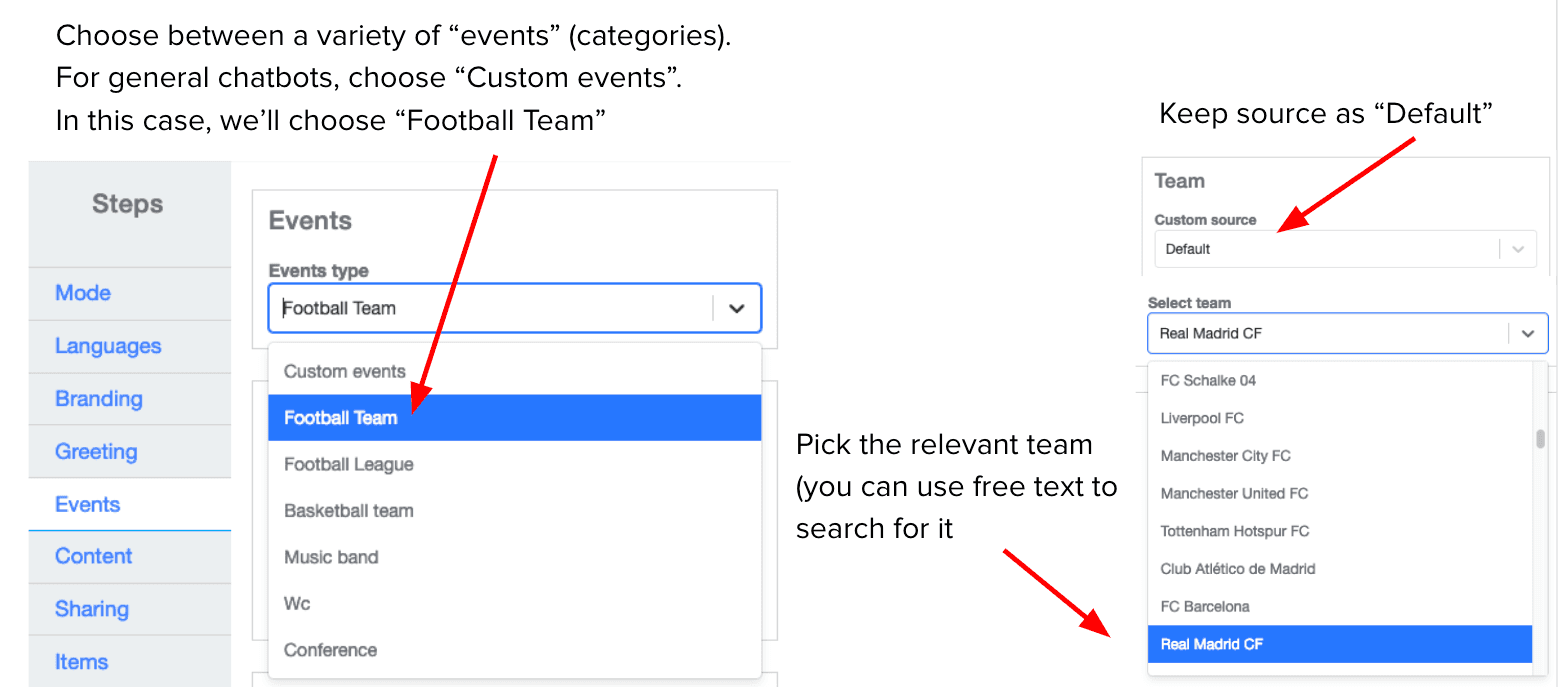
Choose between a variety of “events” (categories). For general chatbots, choose “Custom events”. In this case, we’ll choose “Football Team”.
Pick the relevant team (you can use free text to search for it).
Step 10: Integrate Events to the Chatbot
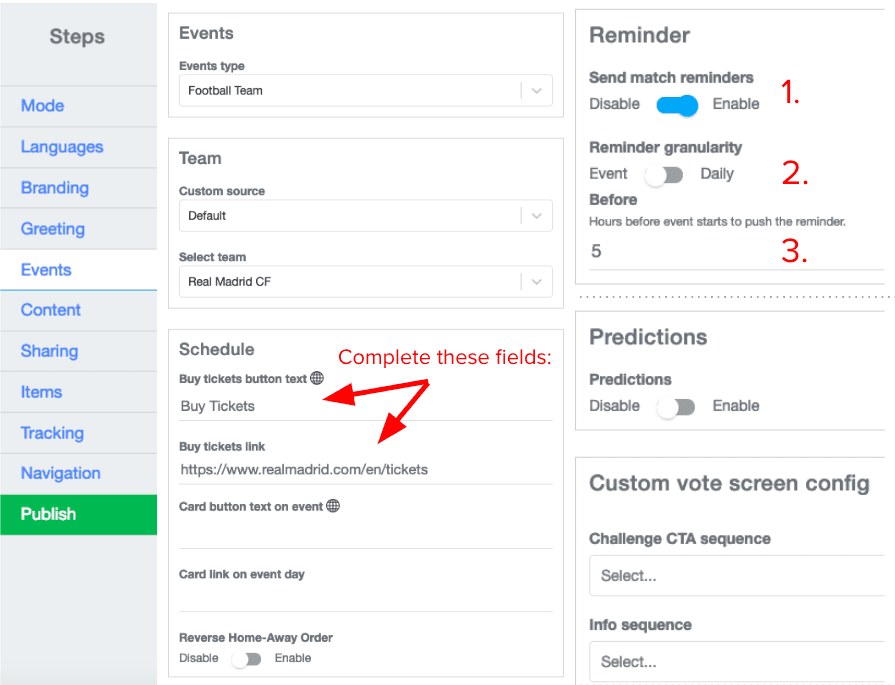
1. Enable match reminders - will be sent automatically by the chatbot.
2. Recommended granularity: Per event
3. Hours before event - push reminder
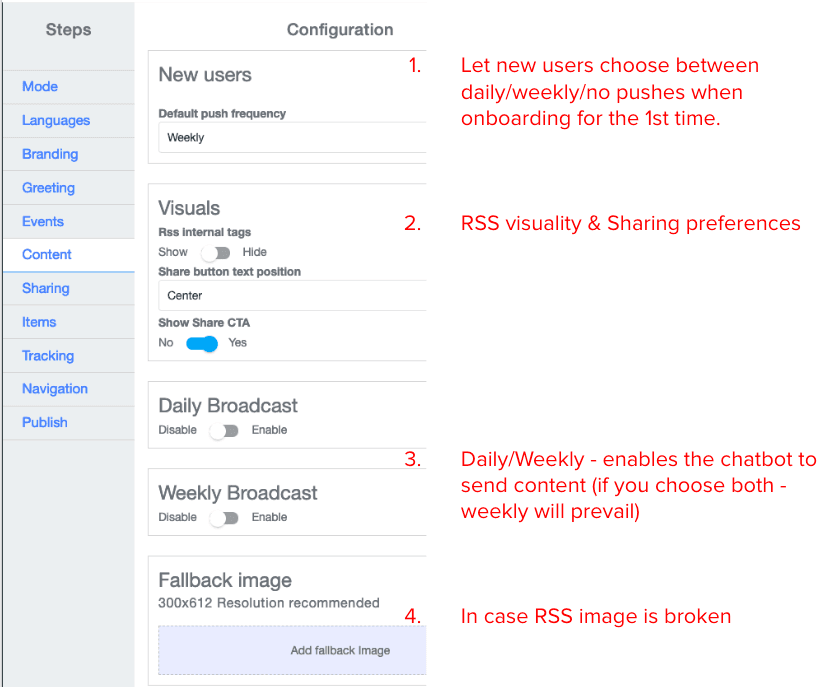
1. Let new users choose between daily/weekly/no pushes when onboarding for the 1st time.
2. RSS visuality & Sharing preferences
3. Daily/Weekly - enables the chatbot to send content (if you choose both - weekly will prevail)
4. Set fallback image In case RSS image is broken
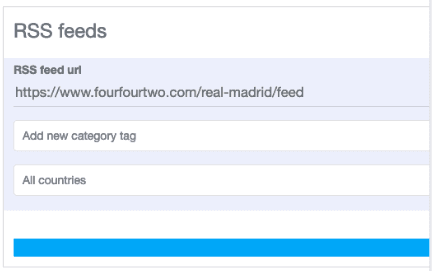
You can connect RSS feeds:
Connect Youtube feed:

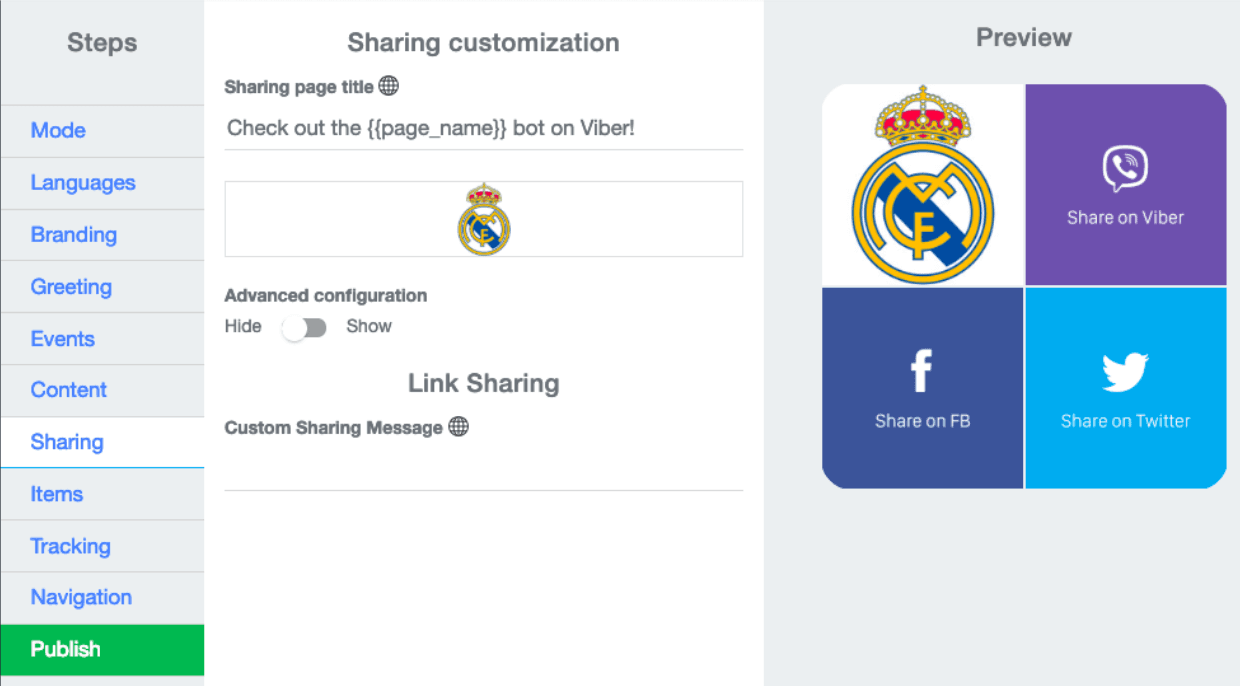
Step 11: Configure Viber Chatbot Sharing
Allow users to share your chatbot.
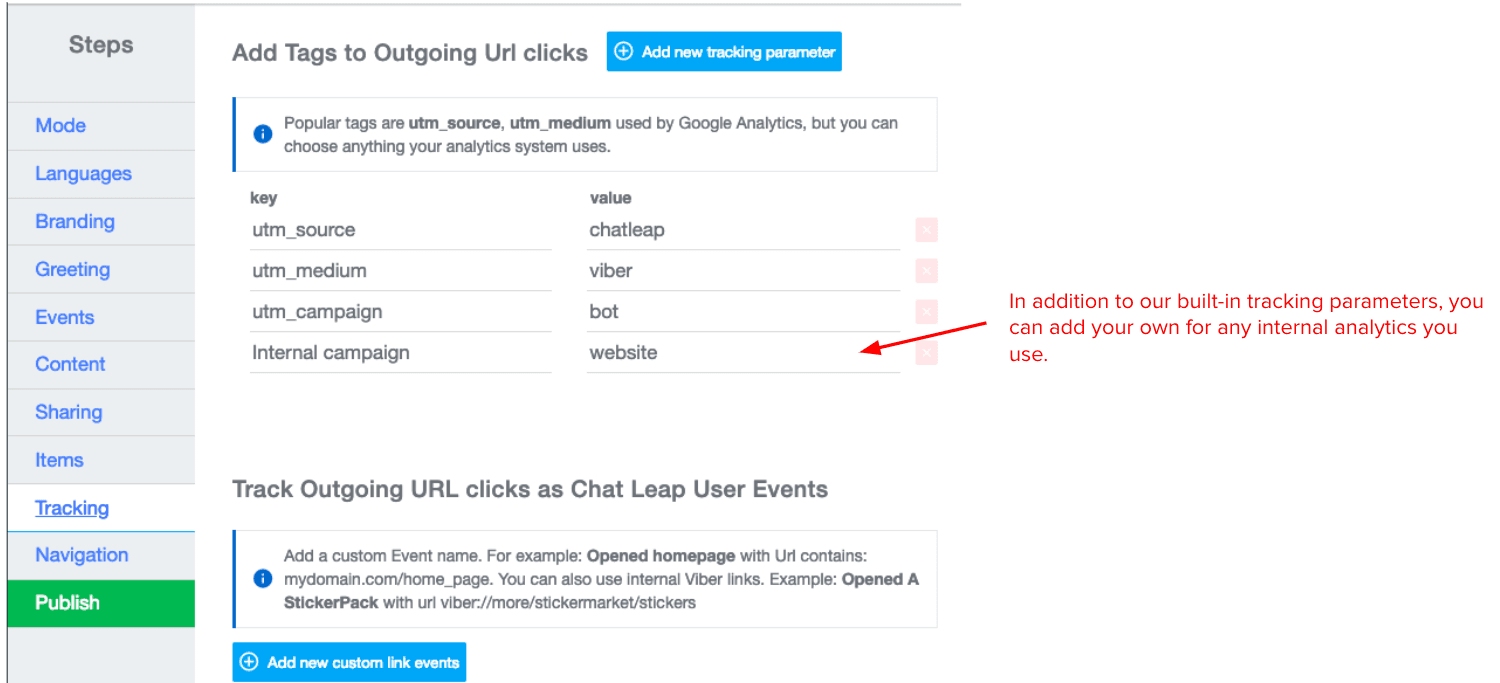
Step 12: Optional: Add Tracking Parameters
Track user interactions.
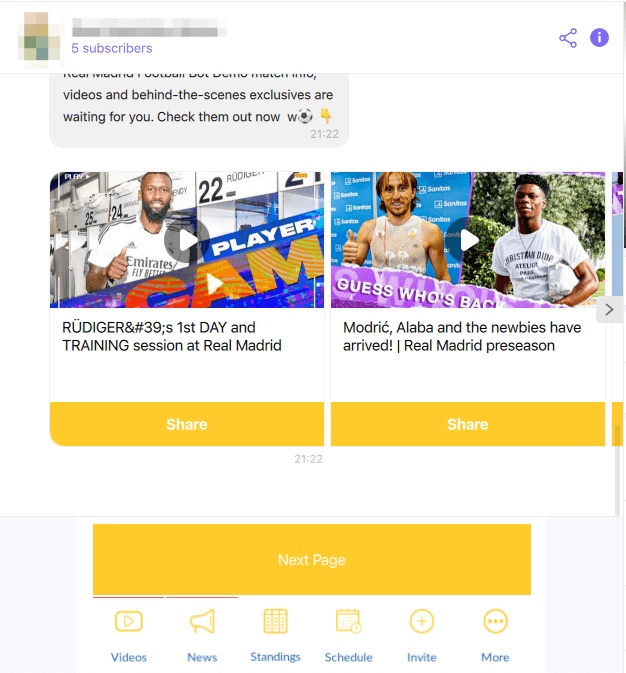
Step 13: Configure Keyboard Buttons
Click the pencil to begin editing. Use various customization elements to determine the keyboard’s design.
The keyboard is permanently shown at the bottom of each chatbot, and serves users with different purposes for further discovery and taking actions.

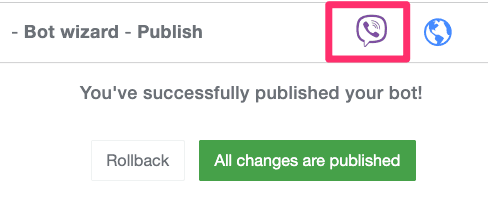
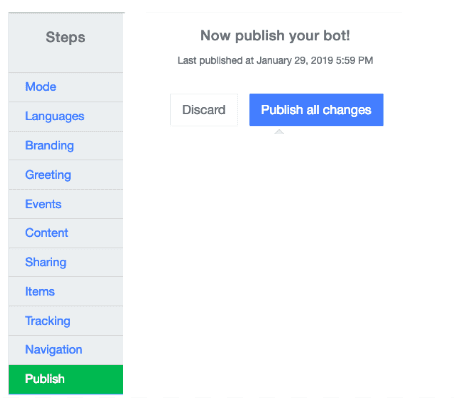
Step 14: Publish your Bot
Click "Publish all changes"
Step 15: See your Bot live on Viber!
Click the Viber icon and see the bot live (on Viber desktop)!